A Real-time Current/Power Meter “Watto” for Profiling Low Power Devices
Watto for iOS
A play on watts, the standard unit of power. Watto makes power profiling at the µ-scale easier than before.
While developing small, low-power devices (think: wearables, implantables), power characterization is of the utmost importance. Many development kits offer some type of embedded profiler, such as Texas Instruments EnergyTrace but these can suffer from incompatibilities with custom boards, are less portable (or bench-friendly), and in my experience, can be riddled with bugs that slow down development.
My goal was not necessarily to get more accurate current measurements—you would use the purpose-built profilers or a DC power analyzer—but to make something that provides better temporal resolution than a digital multimeter and specifically, estimate how real-time loads lead to changes in battery life.
Measuring & Broadcasting

INA226 Breakout Board
I used a Texas Instruments INA226 breakout board that you can find on Amazon. The INA226 operates using a voltage shunt. In brief, the main power line passes through the INA226 breakout board and it monitors voltage drop and determines current (load) and power consumption. The INA226 is a 16-bit measurement accessible through an I2C interface.
To collect the INA226 data and broadcast it over Bluetooth Low Energy (BLE), I used an Arduino MKR 1010 WiFi module. Pairing this with Rob Tillaart’s INA226 Arduino library (and the “native” ArduinoBLE library), it is relatively straightforward to establish a BLE service, BLE characteristics for the data, and write/notify each new piece of data.
You can find my Arduino code for “Watto” on GitHub.
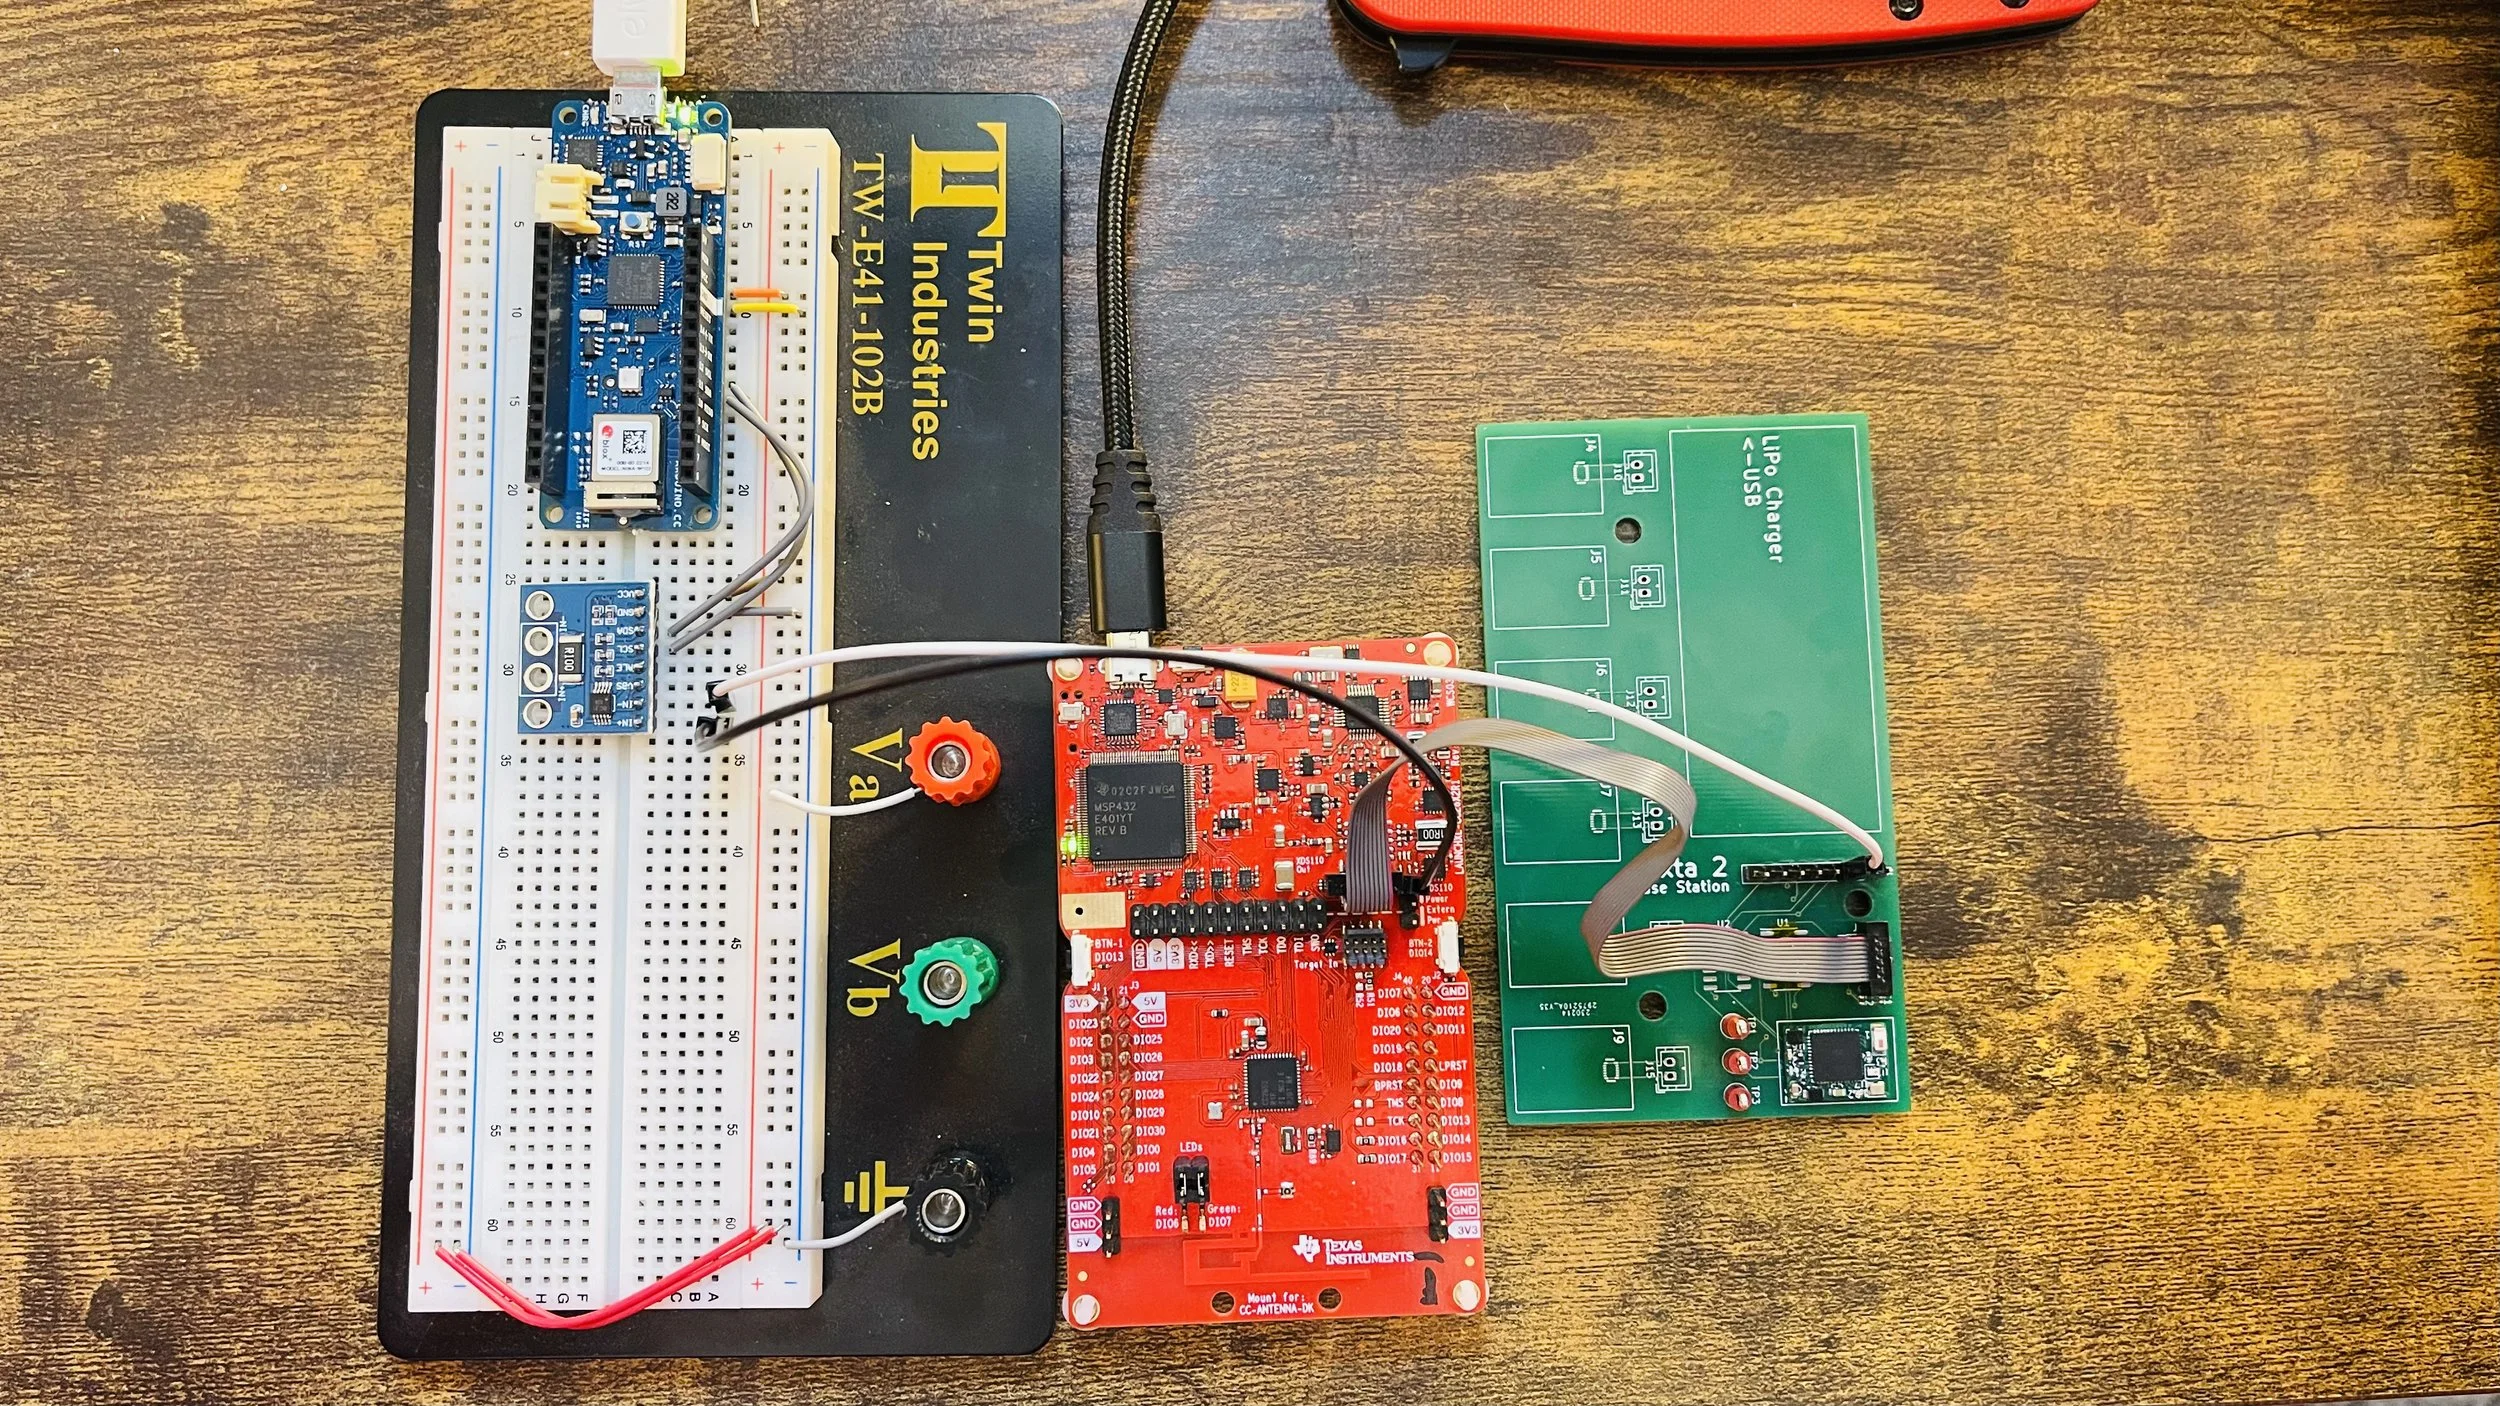
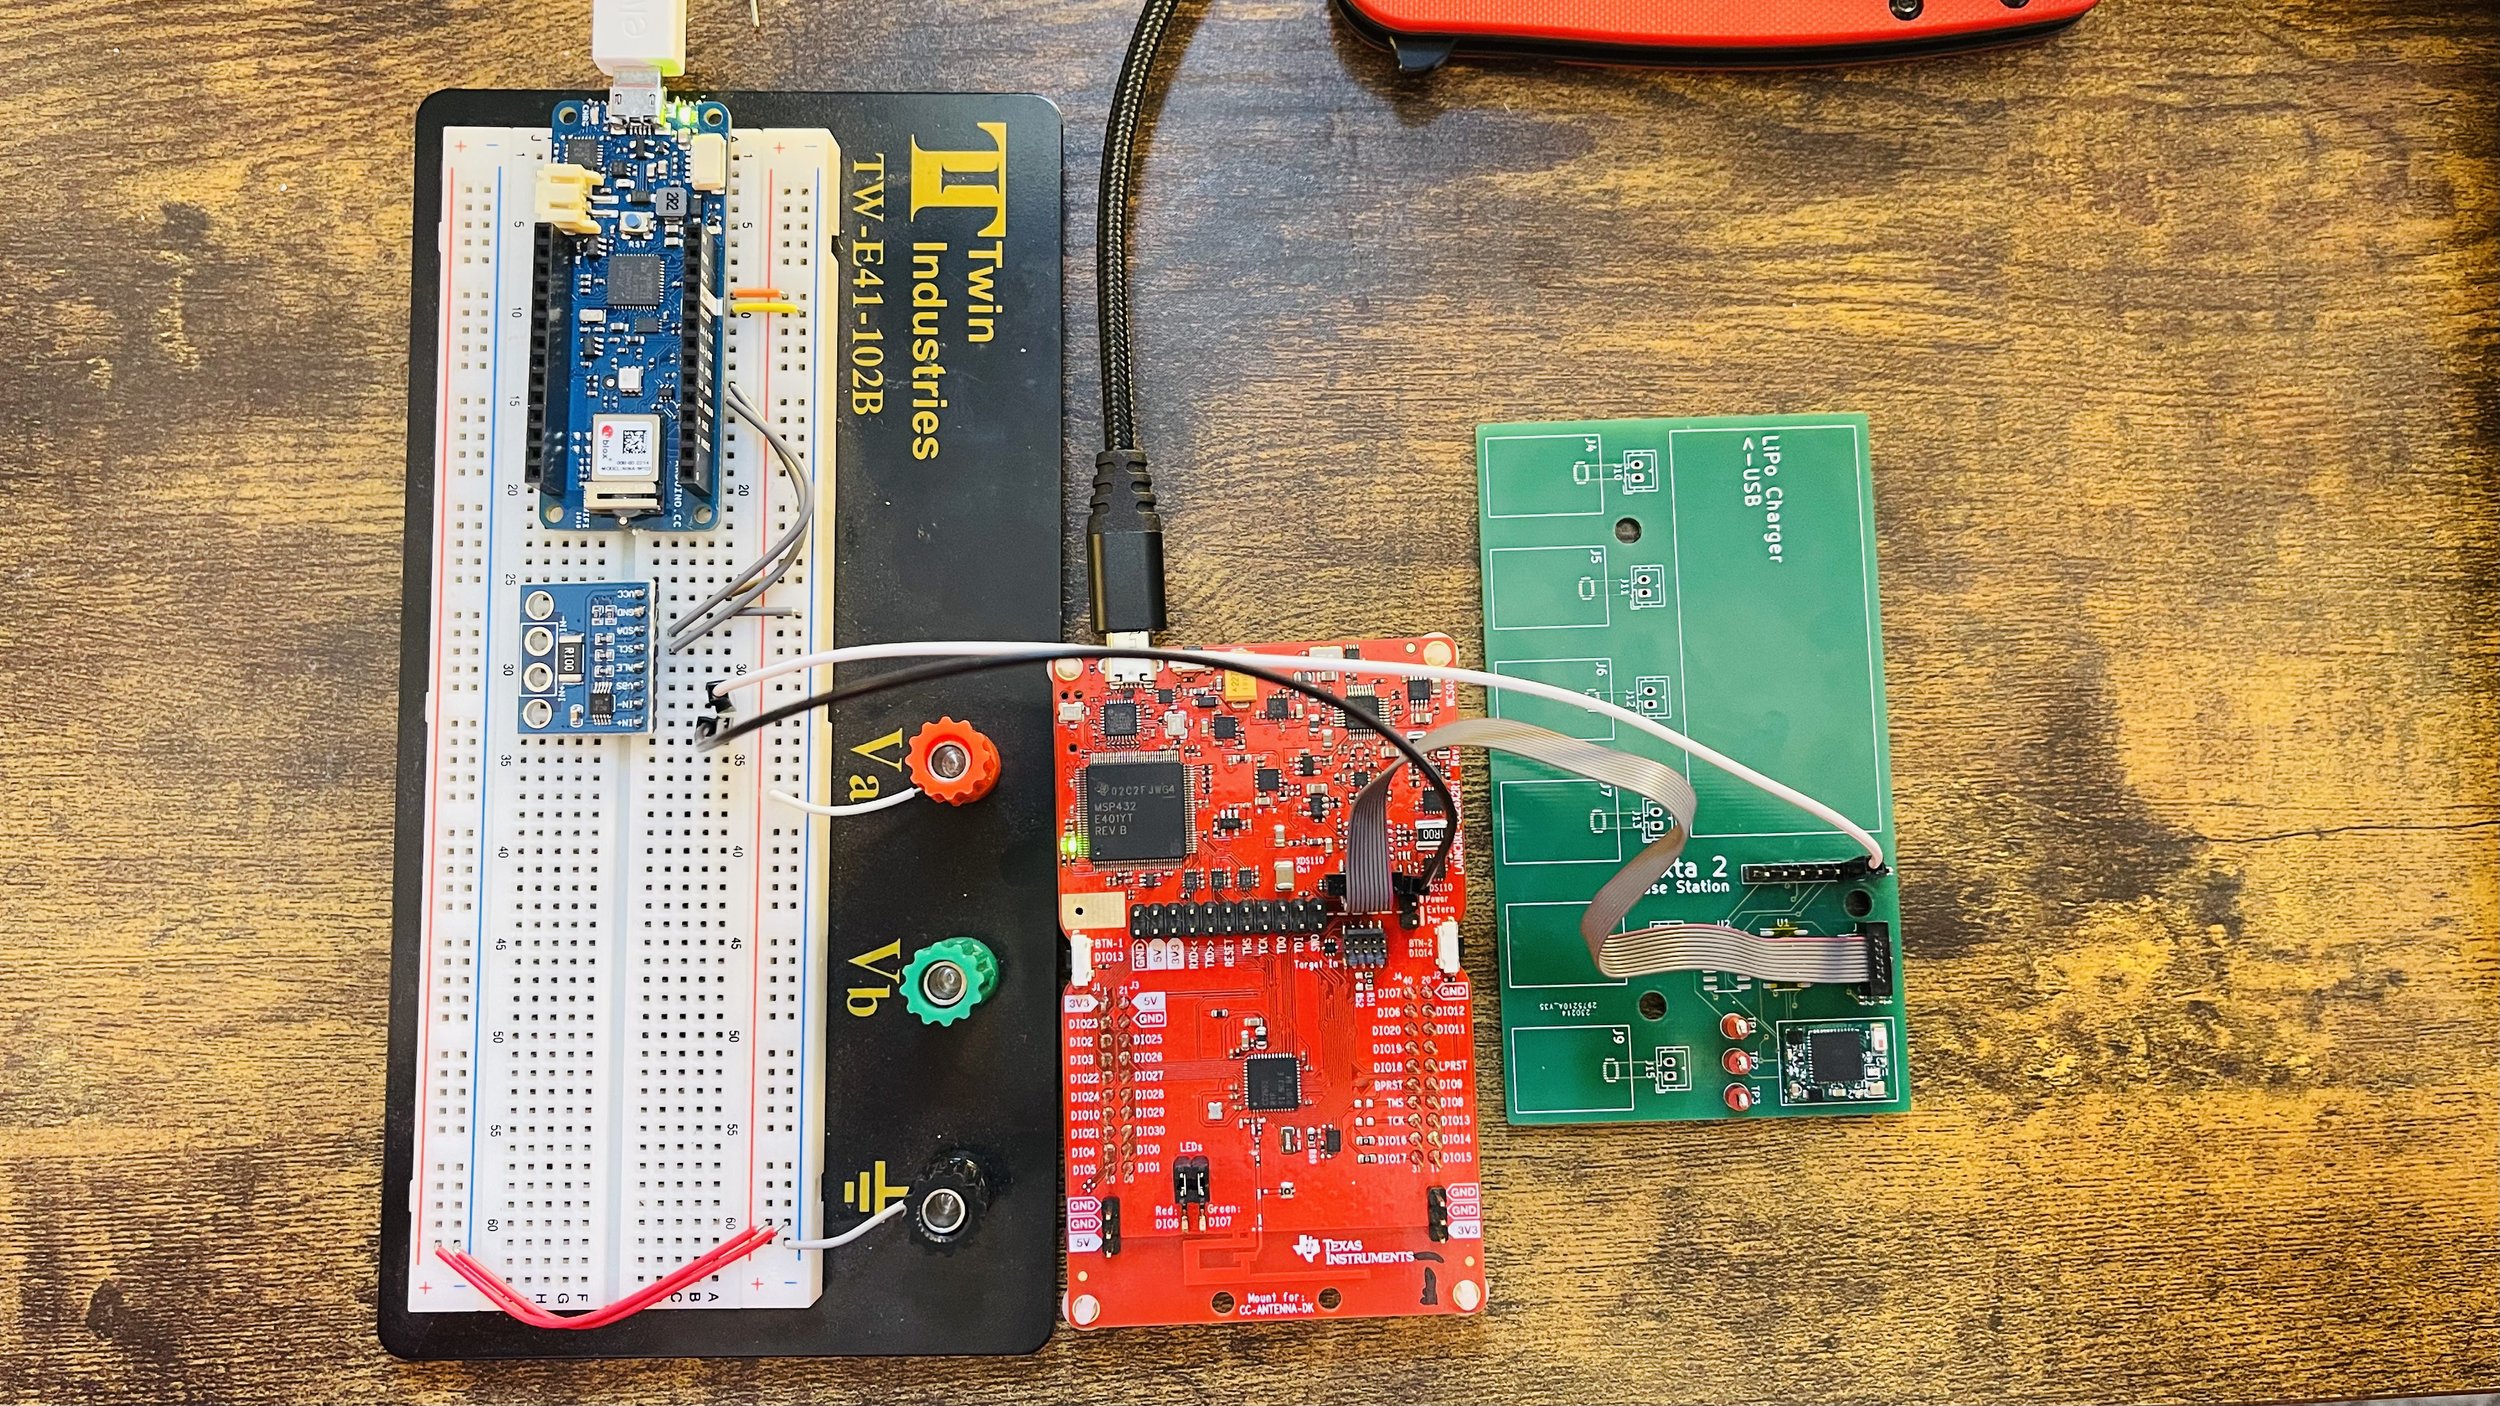
Test Setup. (Left) Arduino MKR 1010 WiFi with I2C lines to the INA226 breakout board. The two wires moving rightward bridge power from a Texas Instruments debugger board (middle) to a custom PCB with a small wearable device (right) that is the “measured” device. This allows the device to undergo testing during debugging.
The watto ios App
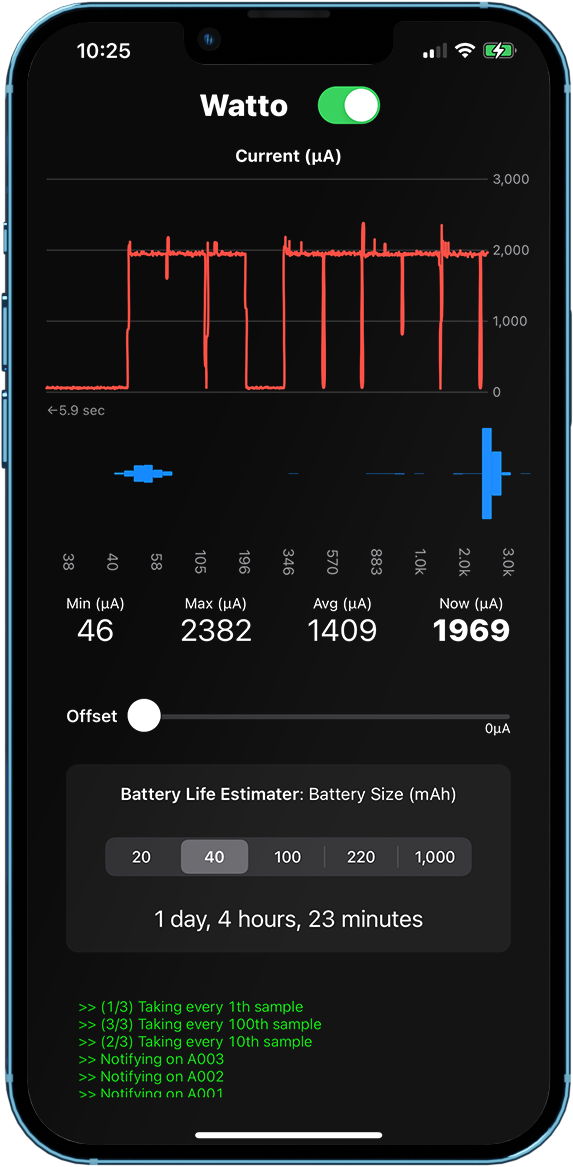
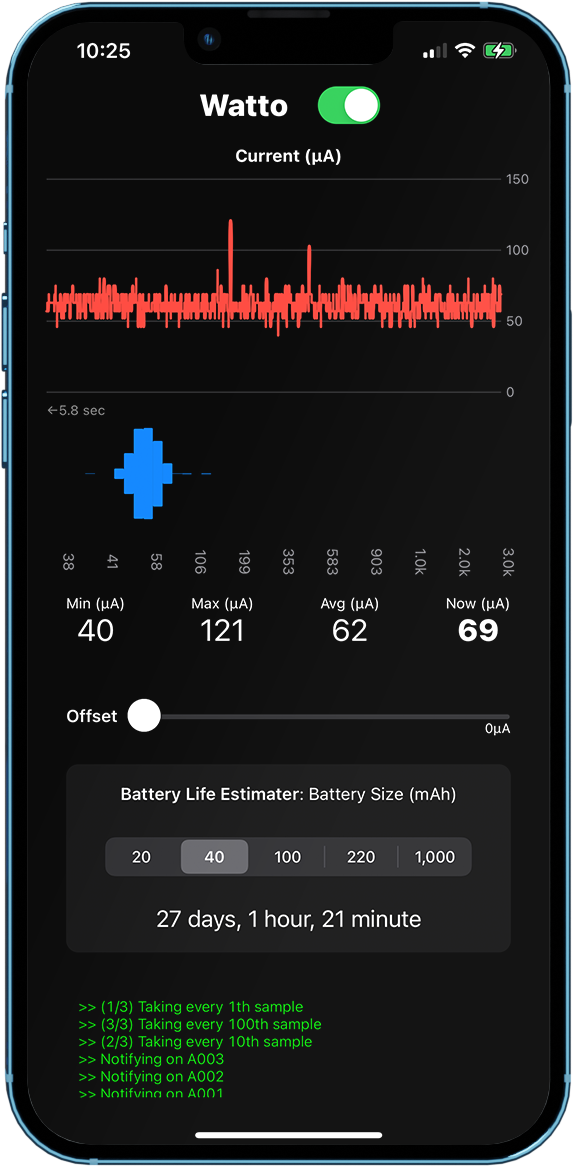
Watto relies on SwiftUI, CoreBluetooth, and Swift Charts. After a little learning curve using SwiftUI from the UIKit, it has been welcomed updated—form and function are generally in one place. The app has a few notable features including a rolling plot of current draw, an auto-ranging histogram of those data, an overview panel, the ability to remove an offset, and an integrated battery estimator.
When the Watto switch is turned on, it will scan, discover, and connect to the INA226/Arduino. It buffers 1,000 samples and plots those across time (red) with a histogram below (blue). In the video, you will see use of the battery estimator, the offset slider, and when tapping on the main plot itself, the sampling rate will change to analyze different lengths of time. By default, it shows every data point sent from the Arduino, which turns out to be ~6-8 seconds per 1,000 samples (this exact number is reflected bottom-left of the plot).
The offset feature is meant to be used in conjunction with breakpoints and a debugger to monitor changes in current based on individual lines of code (or simply to remove some baseline). The battery life estimate works by dividing the selected battery capacity (in milliamp-hours, mAh) by the average current. You can find some other battery calculators on my website. I like this because it allows me to change the modes of my device and see how battery life would change over time: by tapping the plot to take every 100th sample, you can estimate battery life with a ~10 minute window of data, meaning the device can be profiled over modes that require many minutes to play out.
Finally, at the bottom of Watto is a light, read-only console that shows what is happening. You can find the code for Watto iOS App on GitHub.
Conclusion
While a shunt is always ideal to measure current and the INA226/BLE route doesn’t have the extreme bandwidth of other profilers (e.g., to profile very short bursts of energy), it is configurable enough to where I trust in its measurements and it is a worthy bench tool. I have built a µCurrent Gold and consider it useful in tandem with an oscilloscope but I really wanted something that did not need to be manually ranged (e.g., between mA and µA).
A Note on Calibration
I noticed some discrepancies between actual and measured current values across a broad range of values (from 50µA to 10mA). It was bothering me enough that I decided to add a correction function to the Arduino code based on applying several known loads across the device using resistors. From this table of actual and expected results, I created a model in MATLAB and hard-coded it as follows:
// Linear model Poly1:
//      f(x) = p1*x + p2
// Coefficients (with 95% confidence bounds):
//        p1 =       2.499  (2.498, 2.501)
//        p2 =        -156  (-160.6, -151.5)

// Goodness of fit:
//   SSE: 76.4
//   R-square: 1
//   Adjusted R-square: 1
//   RMSE: 3.909
float correctCurrent(float x) {
  return 2.499 * x - 159;
}
There are some calibration methods within the INA226 itself but they are not immediately accessible via the library.
